Cranberry Nut Crumb Muffins

So I keep meaning to make cranberry nut bread, but I can’t think of an occasion or a purpose for it.  I’m usually not one to bake without a purpose because I live by myself so there is a good chance that I will end up eating it all myself.

Recently though I had an occasion to make muffins so I thought I would turn my need to make cranberry nut bread, into a need to make cranberry nut muffins. I looked around on some of my favorite sites to find recipes, and found the one below on the Food Network website.

I did, however, make one smart swap. The recipe called for sour cream, and to be honest, I’ve never been a fan. That’s not to say that I wouldn’t by it for a specific recipe, but I thought a better alternative would be greek yogurt.  So I swapped out the sour cream for greek yogurt and even added a little orange zest for brightness the muffins turned out great!yogurt

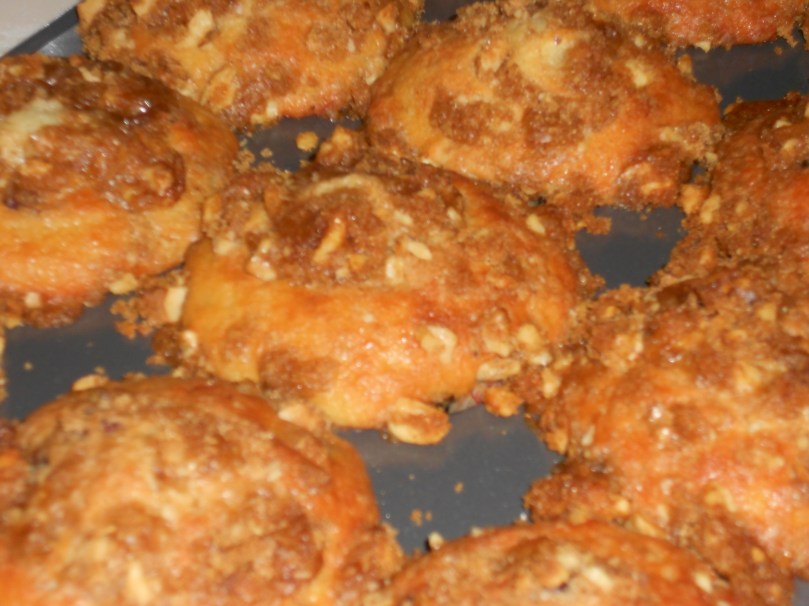
One of the great things about these muffins is the fabulous streusel topping.  It’s like coffee cake meets muffin. You should definitely give these a try the next time you are in need of a breakfast/brunch treat!

Cranberry Nut Crumb Muffins

Yields about 24 muffins, adapted from Food Network

Ingredients

  • 8 Tbs unsalted butter (1 stick), at room temperature
  • 1 cup granulated sugar
  • 3 eggs
  • 2 cups sifted all-purpose flour
  • 1 tsp baking soda
  • 1 tsp baking powder
  • 1/4 tsp salt
  • 1 cup plain greek yogurt
  • 1 tsp vanilla extract
  • zest of one orange
  • 1/2 cup dried cranberries, cherries, or raisins

Topping

  • 3/4 cup light brown sugar, packed
  • 1 Tbs flour
  • 1 tsp cinnamon
  • 2 Tbs cold unsalted butter, cut into pieces
  • 1 cup coarsely chopped walnuts or pecans

Method

  1. Preheat oven to 350 and line cupcake pans with liners.
  2. In one bowl combine flour, baking soda, baking powder, and salt.
  3. In a different bowl cream together butter and sugar.  Add eggs one at a time., then vanilla and orange zest.
  4. Alternate adding dry mixture and yogurt to the wet mixture.  Begin and end with the dry.
  5. Fold in the dried cranberries, and try not to over mix the batter.
  6. To make the topping combine all of the ingredients in a bowl, and smush together with hands or pastry cutter to get to a sandy consistency.
  7. Fill cupcake tins about two thirds full with batter then sprinkle each with the crumb topping.
  8. Bake for 20-25 minutes, until golden brown and tester comes out clean.Yummy topping

Check One Off The List!

I’m not sure if you remember, but one of my goals for 2013 was to try some new cooking techniques.  One of the techniques I mentioned trying was making marshmallows. Mission accomplished, cross it off the list!

I decided it would be festive to make pink marshmallows for Valentines Day. And I was right, it is festive.  I looked around at some different recipes online. It’s tricky when you’re trying something new because there are a few different techniques or ingredients.  Some recipes call for powdered sugar, egg whites, or corn starch, but I went with a much simpler version from Ina Garten.

The recipe I used reminded me of my White Mountain Frosting debacle because there is a similar technique of combining corn syrup, water, and sugar in a saucepan and heating to 240 degrees.  While a little labor and time intensive, I was happy to learn that making marshmallows was not difficult.

Additionally, these were a tremendous crowd pleaser.  There’s something about a fresh marshmallow that will make your day that much better!  These are definitely worth the time and effort! (by the way, these have “dry out” overnight, so make sure you budget your time)

Valentine Marshmallows

Yields 20-40 marshmallows depending on size, adapted from Ina Garten

Ingredients

  • 3 packets of unflavored gelatin
  • 1 cup light corn syrup
  • 1 ½ cups granulated sugar
  • 1 tsp vanilla extract
  • ¼ tsp salt
  • red food color gel (optional)
  • powdered sugar for dusting
  • 1 cup semi-sweet chocolate chips
  • 1 cup white chocolate chips

Method

  1. Prepare a 9 x 13 brownie pan with parchment and dust the bottom with powdered sugar.
  2. In a mixing bowl combine the gelatin with a ½ cup of water.  Allow the gelatin to “bloom” (I think it’s called) while you cook the other mixture.  Some recipes recommend a full half hour.gelatin blooming
  3. In a saucepan over medium heat, combine the corn syrup, sugar, and a half cup of water. After the sugar melts, turn the heat up to high, and cook until it reaches 240 degrees (use a candy thermometer).sauce pan
  4. Once the mixture has reached the correct temperature, remove from heat.  Use an electric hand or stand mixer to mix the gelatin on low as you pour in the warm mixture in very slowly.  Once the mixture has been completely poured in, mix it on high for about 15 minutes until the “fluff” is pretty thick.after 5 minutesafter 15 minutes
  5. Add vanilla, salt, and food coloring and mix until well distributed.now it's pink!
  6. Pour the batter into the prepared pan and use a spatula smooth it out.  This process will be a little sticky and difficult, but you will persevere.
  7. Dust the top of the fluff with powdered sugar (it is easy if you pass it through a sifter).  Allow the fluff to “dry out” overnight.setting overnight
  8. The next day, lift the large marshmallow out of the pan and place on a cutting board.  Use a knife or a cookie cutter to cut out the marshmallows. what to do with the scraps?looking good
  9. Microwave the semi-sweet chocolate chips for 30 seconds at a time until mostly melted.  Use a fork to stir the chocolate until smooth. Dip the marshmallows in the chocolate, and allow to dry.
  10. Microwave the white chocolate similarly and place in a pastry bag with a fine tip or a Ziplock bag with a small corner snipped off.  Once the semi-sweet chocolate has set, use the white chocolate to drizzle a design on top of the layer of chocolate.so pretty!
  11. Allow to set at room temperature or place in the freezer to speed up the process.  Enjoy!

A Basic With a Twist

What’s better than a fudgy brownie at the end of a long day? A fudgy cream cheese brownie!  So easy and so delicious!

I’ve had cheesecake on my mind because my mom and I had a conversation a couple weeks ago.  My mom made a comment that she went to a big chain restaurant out on Long Island, where apparently you have to display calorie counts on the menu.  She noticed that the cheesecake on the dessert menu was fewer calories than the other cake options.  This surprised me because I’ve always considered cheesecake to be an extra indulgent treat. But hey, I’ll take it!

Rather than making a full blown cheesecake, I had a meeting for school earlier this week, so I decided to make cream cheese brownies.  And since we’re so close to Valentine’s Day, why not make them pink!  (or at least pink, plus a little golden brown tint from the oven)

One of my friends made cream cheese brownie cupcakes for a team meeting a couple months ago, so I took that inspiration along with a recipe from the old reliable Smitten Kitchen.  At the end of the day, all you need for great cream cheese brownies is a box brownie mix (I don’t make brownies from scratch), cream cheese, sugar, eggs, and vanilla.  So worth it!

Cream Cheese Brownies

Yields 16 2 inch squares, Adapted from recipe on Smitten Kitchen

Ingredients

  • Your favorite brownie mix (plus all of the ingredients needed for that)
  • 8 oz cream cheese (room temp)
  • 1/3 cup sugar
  • 1/2 tsp vanilla
  • 1 egg yolk
  • dash salt
  • 1/2 -1 cup mini chocolate chips
  • red food coloring gel (optional)

Method

  1. Preheat oven to 350, and prep an 8×8 pan with spray and/or parchment.
  2. Prepare the brownie batter according to the directions on the box. I usually make the “cakey” version rather than the “fudgy” version, which typically just takes an extra egg.winning combination
  3. In a separate bowl use an electric mixer to combine the cream cheese, sugar, egg yolk, vanilla, and salt until well combined. Add the food coloring if you want it to be pink.  Fold in the mini chocolate chips.blobs of goodness
  4. Pour the brownie batter into the pan. Put the cream cheese mixture on top of the brownie batter in blobs.  You can swirl it a little to even out the top.looking good
  5. Bake for 25-50 minutes until just lightly golden brown.  Allow to cool and enjoy!cute little hearts