Stuffed Cabbage

I have always had a love for golumpki. This is the polish word for stuffed cabbage. It just doesn’t get much better than this. Who doesn’t love a polish style meatball swaddled in tender leaves of cabbage. On a day like this, a pot of golumpkis are the perfect comfort meal served along with a side of mashed potatoes.

IMG_0867

This recipe for Stuffed Cabbage is adapted from Ina Garten.

Ingredients
3 tablespoons good olive oil
1 large sweet onion chopped
2 (28-ounce) cans crushed tomatoes and their juice
1/4 cup red wine vinegar
1/2 cup light brown sugar, lightly packed
1/2 cup raisins
salt and pepper to taste
1 large head green cabbage, including outer leaves
For the filling:
2 1/2 pounds ground beef
3 large eggs
1/2 of a large sweet onion chopped
1/2 cup panko
1/2 cup uncooked long grain white rice
1 teaspoon thyme
salt and pepper

Directions
For the sauce, heat the olive oil in a large saucepan, add the onions and cook until the onions are tender. Then, add the tomatoes, vinegar, brown sugar, raisins, salt, and pepper. Bring this to a boil, then lower the heat and simmer uncovered for 30 minutes.

In the meantime, bring a large pot of water to a boil. Remove the core of the cabbage with a paring knife. Place the head of cabbage in the boiling water for a few minutes. As the cabbage cooks, peel off each leaf with tongs as soon as it seems flexible. Set at least 12 leaves aside.

For the filling, in a large bowl, combine the ground chuck, eggs, onion, panko, rice, thyme, salt, and pepper. Add 1 cup of the sauce to the meat mixture and mix lightly with a fork.

Preheat the oven to 350 degrees F.

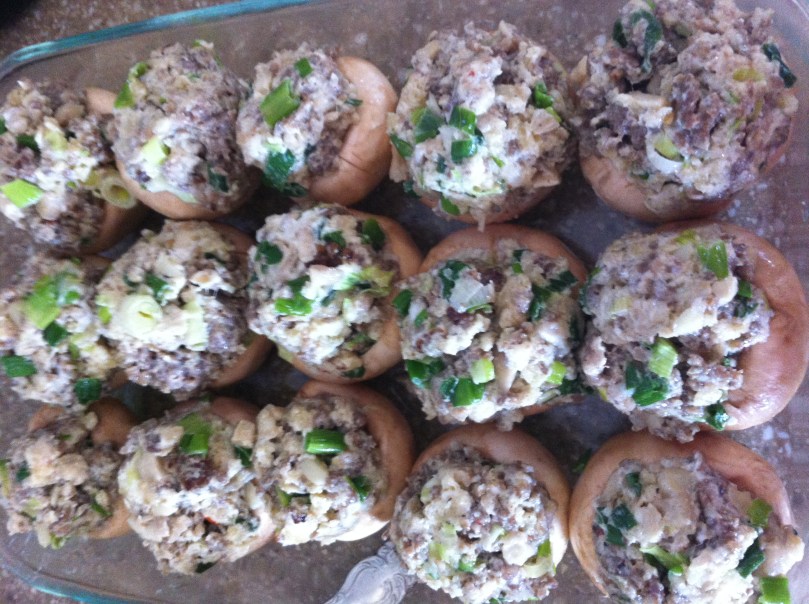
To assemble, place 1 cup of the sauce in the bottom of a large Dutch oven. Remove the hard triangular rib from the base of each cabbage leaf with a small paring knife. Place 1/3 cup of filling in an oval shape near the rib edge of each leaf and roll up toward the outer edge, tucking the sides in as you roll.
IMG_1229

IMG_1230

IMG_1231

Place some of the cabbage rolls in the bottom of the pot in a snuggly fashion. Then, add more sauce and more cabbage rolls alternately until you ve placed all the cabbage rolls in the pot. Pour the remaining sauce over the cabbage rolls. If you have extra meat mixture and not enough cabbage leaves, simply hand form meatballs and place them on top of the cabbage rolls. They will cook just the same and taste just as delicious. Cover the dish tightly with the lid and bake for at least an hour and a half or until the meat is cooked and the rice is tender. Enjoy!

Check One Off The List!

I’m not sure if you remember, but one of my goals for 2013 was to try some new cooking techniques.  One of the techniques I mentioned trying was making marshmallows. Mission accomplished, cross it off the list!

I decided it would be festive to make pink marshmallows for Valentines Day. And I was right, it is festive.  I looked around at some different recipes online. It’s tricky when you’re trying something new because there are a few different techniques or ingredients.  Some recipes call for powdered sugar, egg whites, or corn starch, but I went with a much simpler version from Ina Garten.

The recipe I used reminded me of my White Mountain Frosting debacle because there is a similar technique of combining corn syrup, water, and sugar in a saucepan and heating to 240 degrees.  While a little labor and time intensive, I was happy to learn that making marshmallows was not difficult.

Additionally, these were a tremendous crowd pleaser.  There’s something about a fresh marshmallow that will make your day that much better!  These are definitely worth the time and effort! (by the way, these have “dry out” overnight, so make sure you budget your time)

Valentine Marshmallows

Yields 20-40 marshmallows depending on size, adapted from Ina Garten

Ingredients

  • 3 packets of unflavored gelatin
  • 1 cup light corn syrup
  • 1 ½ cups granulated sugar
  • 1 tsp vanilla extract
  • ¼ tsp salt
  • red food color gel (optional)
  • powdered sugar for dusting
  • 1 cup semi-sweet chocolate chips
  • 1 cup white chocolate chips

Method

  1. Prepare a 9 x 13 brownie pan with parchment and dust the bottom with powdered sugar.
  2. In a mixing bowl combine the gelatin with a ½ cup of water.  Allow the gelatin to “bloom” (I think it’s called) while you cook the other mixture.  Some recipes recommend a full half hour.gelatin blooming
  3. In a saucepan over medium heat, combine the corn syrup, sugar, and a half cup of water. After the sugar melts, turn the heat up to high, and cook until it reaches 240 degrees (use a candy thermometer).sauce pan
  4. Once the mixture has reached the correct temperature, remove from heat.  Use an electric hand or stand mixer to mix the gelatin on low as you pour in the warm mixture in very slowly.  Once the mixture has been completely poured in, mix it on high for about 15 minutes until the “fluff” is pretty thick.after 5 minutesafter 15 minutes
  5. Add vanilla, salt, and food coloring and mix until well distributed.now it's pink!
  6. Pour the batter into the prepared pan and use a spatula smooth it out.  This process will be a little sticky and difficult, but you will persevere.
  7. Dust the top of the fluff with powdered sugar (it is easy if you pass it through a sifter).  Allow the fluff to “dry out” overnight.setting overnight
  8. The next day, lift the large marshmallow out of the pan and place on a cutting board.  Use a knife or a cookie cutter to cut out the marshmallows. what to do with the scraps?looking good
  9. Microwave the semi-sweet chocolate chips for 30 seconds at a time until mostly melted.  Use a fork to stir the chocolate until smooth. Dip the marshmallows in the chocolate, and allow to dry.
  10. Microwave the white chocolate similarly and place in a pastry bag with a fine tip or a Ziplock bag with a small corner snipped off.  Once the semi-sweet chocolate has set, use the white chocolate to drizzle a design on top of the layer of chocolate.so pretty!
  11. Allow to set at room temperature or place in the freezer to speed up the process.  Enjoy!

Sausage-Stuffed Mushrooms

This is one of my favorite holiday appetizers to make for a crowd.  This recipe is adapted from one of my favorite food network star’s, Ina Garten.  It is simple to make and will please everyone’s tastebuds.  The hint of sherry and fresh flavors really make them special.  You should make them for your Christmas Day appetizer this year…it’s just that easy.

Ingredients

16 extra large white mushrooms, olive oil, 2 1/2 tbsp sherry, 1 lb. Bob Evans or Jimmy Dean sage sausage, 6 scallions minced, 2 garlic cloves minced, 2/3 c. panko, 5 oz. cream cheese, 1/3 cup parmesan, 1/2 bunch fresh parsley minced, salt and pepper to taste

Directions

Preheat the oven to 325 degrees.

Remove the stems from the mushrooms and chop finely.  Set this aside.  Place the caps in a shallow baking dish and toss with 3 tbsp of olive oil and sherry.  Set this aside.

IMG_0737

Heat 2 tbsp olive oil in a medium skillet over medium heat.  Add the sausage.  Make sure to crumble the sausage in the pan as you are cooking it.  Once the sausage is browned, add the chopped mushroom stems and cook until tender.  Stir in the scallions and garlic and cook for another five minutes.  Add the panko crumbs and stir well to combine everything.  Lastly, fold in the cream cheese on low heat and continue until the cream cheese is melted and thoroughly incorporated.  Turn the heat off.  Stir in the parm and parsley.  Then add salt and pepper to taste.

Once the mixture is cool enough to handle, fill each mushroom with the sausage mixture.  There will be plenty of stuffing so make sure to put a heaping pile of it in the mushroom.  Arrange the mushrooms in a single layer in the same baking dish in which you have pre-treated the mushroom caps.  Make sure they are snug in the pan so they do not move around when you place them in the oven.
IMG_0738
Bake until the stuffing is browned. You can only imagine how great they will look once they are cooked. I got so engrossed in the dinner party in which I served them at and forgot to take a final picture. You can check out Ina’s recipe here if you want to take a look at the final product.